Multiple MySQL instances on Mac OS X Client or Server
Wed, Sep 07 2011, 12:20 Database, Mac OS X, MySQL, software PermalinkA new project and a server in the basement, drove us to research how we could replicate MySQL databases of two other servers onto the one in the basement. Quest: we need multiple instances of MySQL on the server, with each its own setup. Our findings and how to set this up on Mac OS X Client (your regular desktop Mac) or Mac OS X Server (your co-located Xserve, Mac Pro or Mac Mini Server) are described on this page.
Comments
CSS buttons
Thu, Sep 01 2011, 00:06 CSS, programming PermalinkToday I converted all download links on this site, from using Javascript + CSS to style them to CSS-only (with a background image). I kept some CSS from the JSbuttons installation, because that is how I still want them to look. In case you're interested, here's the CSS:
General CSS:
.mybutton {
display: block;
position: relative;
float: left;
background: #aaa;
padding: 5px;
margin-top: 0px;
margin-bottom: 10px;
border: 1px solid gray;
border-radius: 5px;
text-decoration: none;
text-align: center;
color: #fff;
font-style: normal;
font-weight:bold;
line-height: 15px;
cursor: pointer;
}
.mybutton:active { background: #444; }
.mybutton:hover { background: #eaeaea; }
.mybutton.blue { background: #2ae; }
.mybutton.blue:hover { background: #05b; }
.mybutton.green { background: #5b5; }
.mybutton.green:hover { background: #282; }
.mybutton.pink { background: #e1a; }
.mybutton.pink:hover { background: #a0a; }
.mybutton.yellow { background: #dd3; }
.mybutton.yellow:hover { background: #aa0; }
.mybutton.black { background: #222; }
.mybutton.black:hover { background: #000; }
.mybutton[class] {
background-image: url(%pathto(button-shade.png)%);
background-position: bottom;
}
On a per page basis:
a.mybutton {
height: 16px;
width: 100px;
color: #eeee00;
}
a:hover.mybutton { color:#ff5500; }
And this is the background image (inside the border):

| Normal link: | .mybutton link: |
| Go to Apple | Go to Apple |
| <a href="http://www.apple.com/">Go to Apple</a> | <a href="http://www.apple.com/" class="mybutton blue">Go to Apple</a> |
Stropdasknoop
Sun, Aug 28 2011, 21:24 Art PermalinkOp deze pagina staan een serie 'how-to' stropdasknopen. Kan nog eens van pas komen!
Goodbye 3.5 inch floppy disks
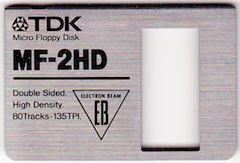
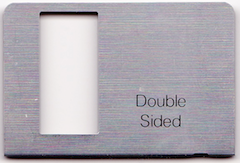
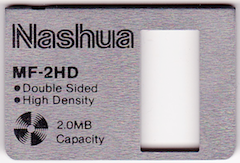
Mon, Aug 22 2011, 18:51 Disk, History PermalinkI was cleaning up my IT-stuff, like cables, manuals and old software (a 2-yearly routine) and finally found no use anymore for software on floppy disks. I liked the diversity of the prints on the metal labels and found that a part of this IT-history that is now closed, could be saved. So I scanned a few:


More of these on this page!
If anyone feels (s)he likes to add some to this 'collection', feel free to email them to me.


More of these on this page!
If anyone feels (s)he likes to add some to this 'collection', feel free to email them to me.
SetEXIFData 3.0
Mon, Aug 22 2011, 00:42 Apple, Mac OS X, Photo, REALstudio, software, Xojo PermalinkVersion 3.0 of SetEXIFData is out, with the following changes:
New:
Bug fix:
New:
- Added a checkbox which can be set on to remove all keywords (and not add any new ones) from all the files in the files-list.
- Added a checkbox which can be set on to titlecase all keywords, which was previously done automatically. It is set on by default.
- Added a checkbox which can be set on to autofill the document name property of each photo listed with the current file name.
Bug fix:
- Problem with assigning keywords for Preview, Photoshop CS5 and iPhoto has been fixed. Turns out these programs let '-subject' overrule '-keywords' for keywords.
My installation of Mac OS X Lion
Tue, Jul 26 2011, 16:08 Apple, Mac OS X PermalinkThis installation of Mac OS X Lion took my weekend and then some, to figure it all out and get things to work. Making the backup took almost a day. The order of the steps taken is now what it should have been, had I been able to see in the future. I hope these steps can help you to speed up your installation of Lion.
1) I downloaded Lion from the Mac App Store
2) Located it in /Applications, copied it to a backup disk.
3) Right-clicked it and chose 'Show package contents'
- Opened the Folder 'Contents'
- Opened the Folder 'SharedSupport'. In there is a file 'InstallESD.dmg'
4) Inserted a 8GB USB Flash Drive into an USB-slot of my Mac
5) Started Disk Utility
- Selected the USB-flash drive in the bar on the left
- Selected the pane 'Partition'
- Chose 1 partition
- Clicked 'Options' and selected 'GUID table'
- Partitioned the drive
- Selected the USB-flash drive in the bar on the left
- Selected the pane 'Restore'
- Dragged the USB-flash drive to the field 'Destination'
- Dragged the 'InstallESD.dmg' to the field 'Source'
- Clicked the 'Restore'-button
Now I can always boot from the flash drive and (re)install Lion.
6) I deactivated licenses of the following software (advise from OnOne):
- All OnOne Software tools
- RapidSearch (just to be on the safe side)
7) Updated the following software:
- Tuxera NTFS
- Glimmerblocker
- Dockstar (Mail plug-in)
- MailTags (Mail plug-in)
- Drobo Dashboard
- FileMaker Pro 6 (PPC-only) to 7 (Universal)
- EyeTV
- Perian
- Flip4Mac WMV
- ChronoSync and ChronoAgent
8) Removed following apps
- DivX and 3iVX (Uninstallers are in their respective folders in /Applications)
- FlagIt! (Mail plug-in) -> uninstalled this, development halts and Lion has now 7 flags of different colors. I also went into System Preferences and uninstalled SpiceShaker and removed the SpiceRack Prefpane since nothing else but FlagIt! was using this.
- Adobe AIR (removed everything from '/Application Support' and '~/Application Support' folders)
Apple has made the folder 'Library' in the home folder invisible. But I can get to it via SHIFT-CMD-G and by entering the following path '~/library'.
9) Restarted my Mac
At the bongggg, I held down the SHIFT-key until a progress bar appeared: Mac starts in Safe-mode. From our national Apple Doctors (CARD Services) I learned that it is best to install major updates while in 'safe mode'.
10) When logged in, I attached a 1TB backup disk and used Carbon Copy Cloner to backup my Mac OS X startup disk.
11) After the backup had finished, I shutdown the Mac and disconnected all external hard disks, including my Drobo.
12) Started my Mac again in Safe-mode
13) Installed Mac OS X Lion
On my iMac, I simply clicked the Lion icon in the Dock. I booted my MacBook Pro from the USB-flash drive and installed Lion from there.
14) After installation, I let the Macs boot normally and logged in.
15) Performed Software Update; restarted normal
16) Opened 'App Store' from the Dock and downloaded 'Xcode'
- I installed Xcode by starting 'Install Xcode' in /Applications
17) I rely on FastCGI (for Lasso 9), which is not included in Lion anymore. So I had to restore the file 'mod_fastcgi.so' from the backup disk, made in step 8. The Lion installer also removed the file 'Lasso8ConnectorforApache2.2.so' which is needed for Lasso 8. I copied both of them back. If you need these, you can find them and copy them to '/usr/libexec/apache2/' (same folder as in 10.6)
18) Then, my iPhone was not recognized, because somehow either the Lion or Xcode installers have removed a file call 'usbmuxd' and support files. To get this working again, I had to reinstall iTunes from scratch, like this:
- Via 'Terminal', deleted iTunes: 'sudo rm -R /Applications/iTunes.app'
- Next, I followed the steps outlined here: support.apple.com/kb/ht1747
- Then I downloaded iTunes from Apple's site and installed it.
iPhone is back!
19) Activated the software licenses again (see step 6).
20) If you run Windows in Parallels 6 off a Bootcamp partition, and it won't start with Parallels, do what is described here: http://kb.parallels.com/en/111629
21) And the last thing I did was repair disk permissions via Disk Utility.
22) A restart and back to business.
23) If QuickTime Player X is behaving strange, like when you click a player's window, you click through it, get rid of old files in the Preferences folder. Open Terminal and type the following exactly as written:
cd ~/Library/Preferences
rm *QuickT*X*
Mac OS X Dock Separators
Mon, Jul 25 2011, 13:29 Apple, Mac OS X, REALstudio, Xojo PermalinkHere are some Mac OS X Dock separators (dock-separators(apps-intel)). These are mainly dummy apps and folders with a transparent icon and names that consist of only spaces. The apps are all Intel-only. The .zip contains 6 apps, the first one has a name of 1 space and the 6th one has a name of 6 spaces, and 3 folders with the same transparent icon and spaces as names. Here's how I use them:


 Transportation Administration System
 Snoezelen Pillows for Dementia
 Begeleiders voor gehandicapten
 Laat uw hond het jaarlijkse vuurwerk overwinnen
 Betuweroute en Kunst
 Hey Vos! Je eigen naam@vos.net emailadres?
 Kunst in huis? Nicole Karrèr maakt echt bijzonder mooie dingen
 Kunst in huis? Netty Franssen maakt ook bijzonder mooie dingen

